People are completely in love with the Apple brand, and one in three people already have something from this brand, whether it’s an iPhone, MacBook, or iPad. Nevertheless, Apple Watches have become quite popular among people.
Like it wasn’t enough that they created something that can track your well-being and health, Apple decided to notify you of emergency services when they sense that you’re in some danger. It’s a great accessory to have and use daily, as it will make you feel safer and more comfortable.
Hard fall detection is a great opportunity that will notify you whether you’re in danger or not. It could save your life someday. The only thing left is educating yourself on how to set up hard fall detection on Apple Watch. So, let’s get started!
About the Brand
Apple is one of the few fascinating companies worldwide. Marc Gobe and other marketing professionals contend that the success of Apple is primarily due to its brand. It has nothing to do with iMac or iPod products.
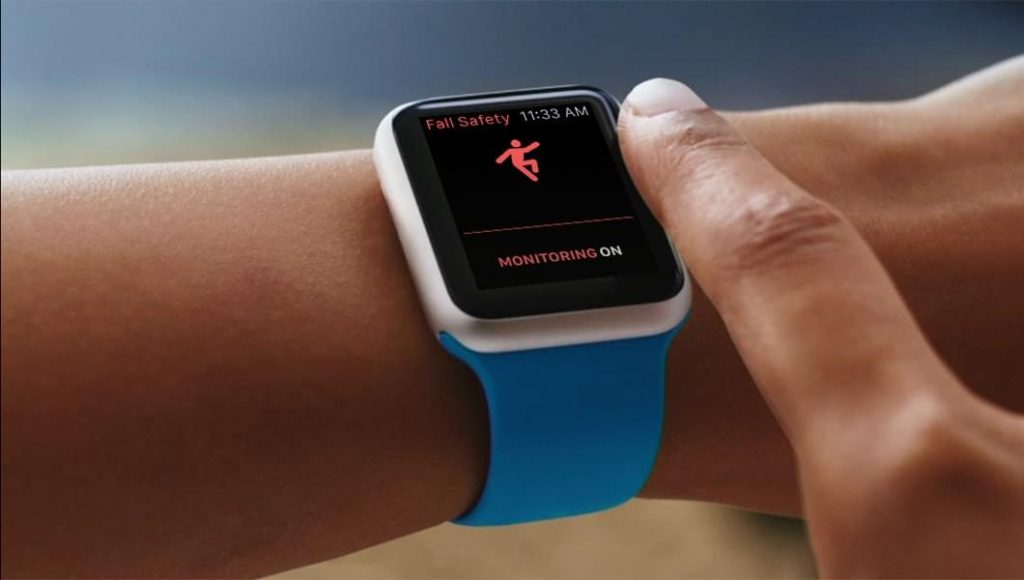
Health and productivity functions on Apple Watch are well-known. Fall Detection is a vital health function that has been shown to save lives worldwide. It was first made available by the Cupertino-based company in 2018 and has ever since been a feature of every Apple Watch.
What Is Fall Detection?
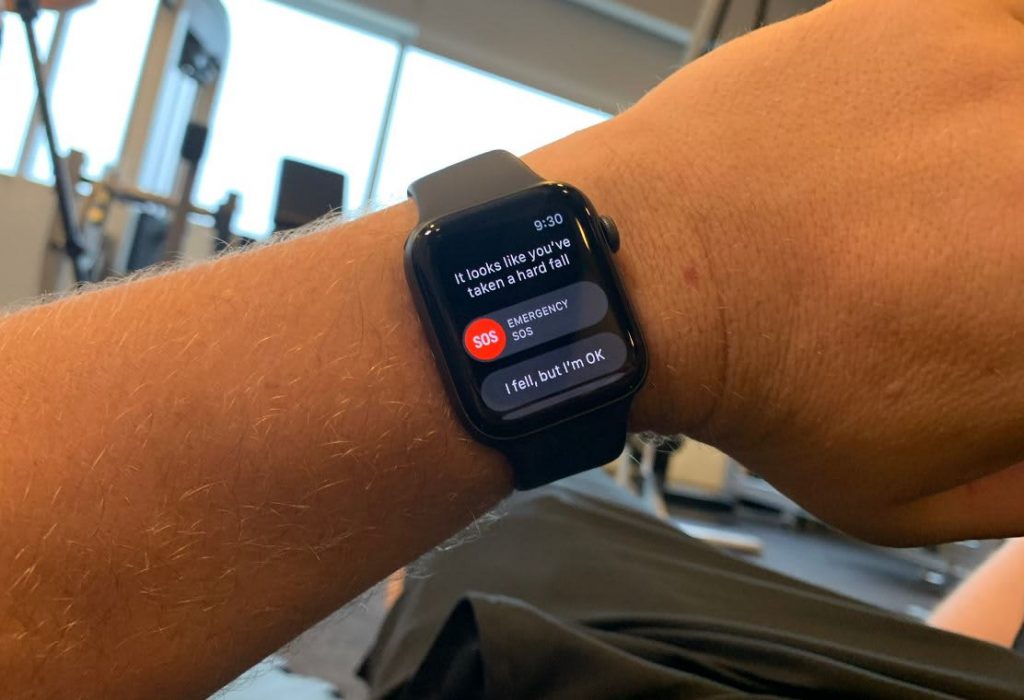
Apple Watch’s Fall Detection feature is mainly intended to identify when you experience a severe fall while wearing the Apple Watch. If you fall, it alerts you by tapping you on the wrist, sounding an alarm, and displaying a warning.
In case you run into trouble, you have the option to call for assistance. However, if the watch notices a lack of response, it automatically contacts and plays an audio message alerting the emergency services that you need extra help.
When your Apple Watch notices you’re relocating, it waits for you to react to the notification and won’t immediately dial 911. When you haven’t moved for about a minute, your watch will automatically place the call.
When the call is over, your watch sends a message with your location to your emergency contacts, informing them that it detected a hard fall and requested assistance. Your medical ID is where your watch gets the emergency contacts.
Numerous emergency service phone numbers are available in some nations and regions. In these nations, Apple Watch will dial the ambulance service phone number.
How to Set up Hard Fall Detection on Apple Watch
To activate the features, follow the simple steps:
- On your iPad or iPhone, open the Watch app.
- In the bottom section, select the My Watch tab.
- Then, after selecting Emergency SOS, turn on or off Fall Detection as desired.
For the Apple Watch to call emergency services if wrist detection is disabled, you must also enable it. Tap Passcode in the Apple Watch Settings app, and then turn on Wrist Detection.
From your Medical ID, Apple Watch retrieves emergency contacts. By going to iPhone Settings > Health > Medical ID, you can create a Medical ID and add people to contact in an emergency.
Multiple people can be added as emergency contacts who will be alerted in the event of an emergency. If no connections are entered, the watch will only dial 911 in an emergency.
Why Should You Use This Apple Feature?
People between the age of 65 and older who fall yearly are more than one-third. Older people can benefit significantly from fall detection because they are particularly susceptible to such accidents, especially when nobody can take better care of them.
Additionally, it may come in handy if you trip or have an accident while running, riding bikes, or hiking. It will automatically call for help and probably save your life if you’re alone, stuck, or unconscious.
Numerous incidents show how the Apple Watch’s fall detection function has prevented fatalities. After he fell unconscious and hurt his head on the floor, it recently saved the life of a 71-year-old woman.
As in the previous example, a 24-year-old bike rider was transported to a hospital promptly after calling for assistance via his Apple Watch following the accident.
That’s why you need to set up hard fall detection on the apple watch, so your loved ones are safe when you’re not near them.
Read more: Why Am I Not Getting Notifications on My Apple Watch?
What Happens When You Are Immobilized?
Your Apple Watch will immediately begin a 30-second countdown and sound an alert if it notices you have been stationary for about a minute. It will also tap you on the wrist. It gets louder for you to hear the signal or someone nearby.
Tap Cancel if you do not want to contact emergency services. Your Apple Watch contacts emergency services on its own when the countdown expires. After linking the call, your Apple Watch represents an audio message alerting emergency services that it detected a hard fall and then shares your current location with them as coordinates in latitude and longitude.
Your Medical ID is also automatically shared with emergency services if the Share During Emergency Call setting under your Medical ID was previously enabled.
The audio plays loudly the first time the message plays, and then it becomes quieter so that you or a nearby interaction companion can communicate with the responder. The message keeps playing until you tap Stop Recorded Message or the call is terminated.
Your watch cannot automatically dial 911 unless Wrist Detection is activated; make sure Wrist Detection is enabled on your Apple Watch by opening the Settings app, tapping Passcode, and then opening the app.
Read more: Why is My Apple Watch Dying So Fast?
Conclusion
As you can see and learn from this today, it’s essential to know how to set up hard fall detection on Apple Watch, as you can save your life or the ones you truly love.
You must take the situation more seriously because, while looking good with the watch on the wrist, you can use it for something more beneficial to you. If you don’t want the hard fall detection, you can turn it off the same way you’ve turned it on.